Lyn Brown, one of the Faceborg Group Bushwhackers, reminded me that I'm not done describing work we have done on Raindrop, the Bushwhacker Plus 15FK. Hence this catch-all Post so here goes with no particular order.
Oh! Lew performed the first MOD fifteen minutes after we pulled in the driveway. That absurd backboard thingy across the back end of the bed had to be gone soonest:

Much better:

When using shore power why not use a quiet smooth electric heater? Indeed, so we installed a permanently mounted and hard-wired Broan 1500W 120VAC heater. Amazon haz 'em:


These TTs come equipped with stabilizer jacks on the rear corners only and experience has taught us you need all the stabilization you can get so Lew went shopping for a pair of OEM style B.A.L. stabilizer jacks. Early in the Summer pandemic shortages meant paying a fortune to an eBay merchant but Bezos now has them back in stock (albeit still for a princely sum):
Here they are installed. A nice sharp drill bit is an asset because the frame is some high-tensile-strength alloy:


These trailers come with a single step and because they are built with high ground-clearance the first step is a big one ...... too big for us Olds. Bezos to the rescue, a two-step direct bolt-on replacement that took few minutes to swap out.
Holy price-gouging, Batman! Again, available for a princely sum:
And here it is:


Although cute the OEM window blinds are NOT light-tight so they and the absurdly heavy valences had to go. Jan whipped up a pair of quilted simple roll-up window covers (with a layer of ironing-board insulation in the center):


And along these same lines the door window received a [removable] quilt-art light-blocker as well:

We purchased a 50AH LiFePO4 "Lithium" battery and installed it under the bed. This 12# battery produces the same number of AH output as a so-called 100AH SLA battery because LA batteries must not be discharged more than 50% to avoid battery damage.
.jpeg)

A battery circuit-breaker/disconnect-switch is part of the installation:

Removing the OEM battery from the tongue created space for secure storage of the Stinky Slinky (RV sewage drain hose) and a pile of "Lego-block" leveling blocks:


Early on Lew discovered this kink in the freshwater tank vent pipe which would make filling the tank difficult if not impossible:

A fix was done while doing the bathroom MOD. Two 90 degree brass elbows were employed, one visible from underneath:

And one visible inside under the toilet (the white hose a bit below center in the pic). Oh, and visible as well in this pic is the cover over the OEM blackwater tank outlet:

The removal of the black tank meant removing all the exterior underneath plumbing seen in this pic:

Theis remaining 1.5" drain line from the gray-water tank:

Was fitted with a valve and a 3" RV hose fitting:


As-built the sink-trap uses up much of the storage space under teh sink so Lew fixed that with a waterless trap, again courtesy Bezos Inc:
Before pic (also showing the Camco water filter we installed):

After pic showing much improved storage space:

Speakina' storage, Lew changed the cupboard hinges so the door opens upward against the ceiling instead of sideways as a head-banger (voice of experience speaking) Also a shelf added for organizing purposes:

Speakina' shelves we added (and stained to match) the shelf to the right of the cupboard. It is attached with blocks screwed into the cupboard and into the rear OEM shelf:


Speakina' organizing, these Sterilite containers fit through the outside access door:

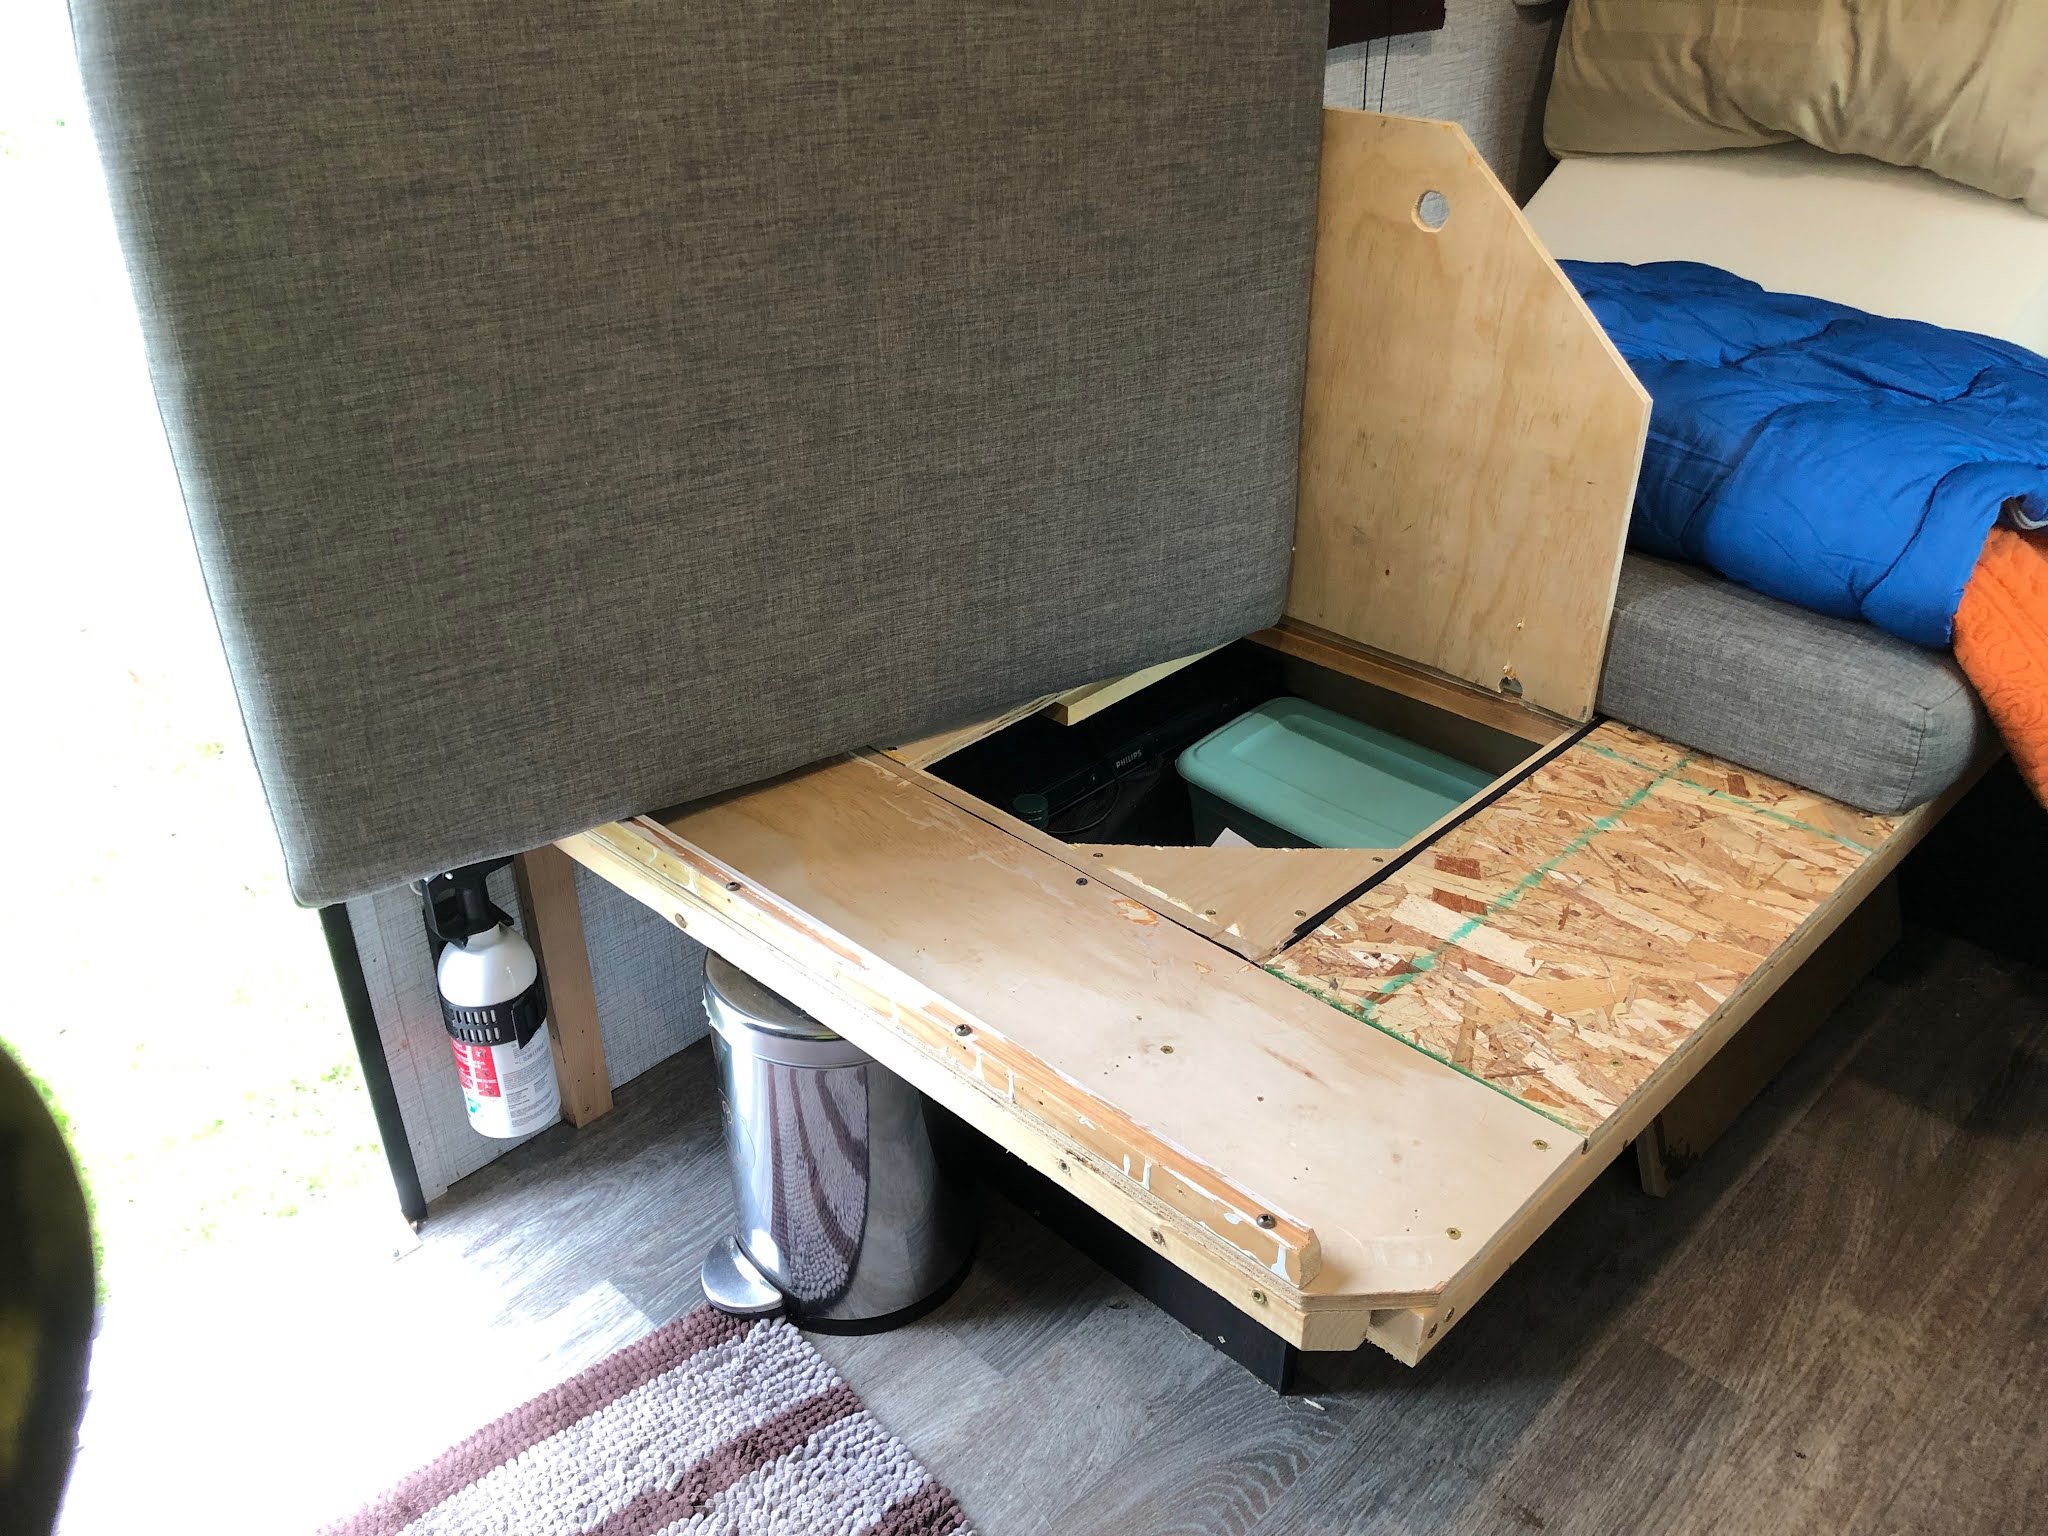
Another storage solution. The passenger-side bench lid is removable to gain access to storage space underneath. Lew screwed the lid down for strength (because cantilevering the bed extension) and created a hinged lid for better access to the storage. This pic shows the hinged lid and the cantilevered extensions to the original bench, both width ways and lengthways:
Well, that's it for now but it is a work in progress, this matter of getting the most for the least.
No comments:
Post a Comment
Your comments are welcomed. Please consider using our links for internet purchases. We earn a commission!