Or Life in Eighty Square Feet. This new "Tiny Home" is really tiny and every little thing must be just right in order for two [old] people and a dog to live in it. Yes, accommodations peculiar to aging are especially part of the picture. Plus RoVing in the age of Covid has added it's own strictures&needs. Being who we are we pretty much dove in, bought this thing and then went to work making it fit us like a shoe.
STAGE ONE MODS, THE BATHROOM:
Our first trip to Pittsburgh illuminated some problems. For us Covid means NO public bathrooms so Raindrop's bathroom got a workout .... and bugs were revealed. Five days&nights saw the 8.5gal toilet tank full to the brim SO a definite limitation to boon docking/driveway-mooching. Being a "wet bath" (with the toilet tank under the toilet above the floor) meant the toilet seat was too far above the floor for petite-sized Jan to sit comfortably. Additionally, as delivered the toilet wobbled about like a canoe on waves. Also, the [waterproof] plastic bathroom walls were poorly attached and caulked. Once back home Lew went to work.
The first task was exposing the cause of the "wobble" problem.
Lew had figured out that a solution to the several issues would be a home-made macerating toilet emptying into the under-floor 19 gal gray water tank, (the same setup in principle as used almost universally by boat people). Because boat toilets pump flush-water from overboard a land-locked version using on-board pressurized water for flushing was designed and constructed.
A standard RV toilet was used with an off-the-shelf Jabsco Macerator Pump (we've used one of these for years to pump wastewater through a garden hose) mounted beneath and communicating with the toilet outlet:
Suitable blocking was attached to the floor and the toilet/floor/pump assembly was mounted to it. The black pipe lower left communicates with the under-floor graywater tank:
Not yet coupled in this pic, the 1" clear vinyl hose connects the macerator pump to the fitting seen lower left in the pic, thus connecting the toilet to the 19gal tank under the floor:
An old bifold closet door was trimmed down and repurposed as a bathroom door:
It all works beautifully as planned. Before use the toilet bowl is partially filled with water by stepping the pedal partly down. After doing one's business the foot pedal is stepped clear down, which action opens the ball valve flushing the bowl contents into the toilet base whereupon the macerator pump draws and macerates the contents and pumps the effluent into the wastewater tank beneath the floor. This switch activates the pump when the pedal is depressed the last inch:
The toilet is now solidly mounted with the seat at a suitable height and nineteen gallons of wastewater storage is available. The plastic walls have been removed and discarded. There is now a storage shelf and a clothes hamper behind the toilet:
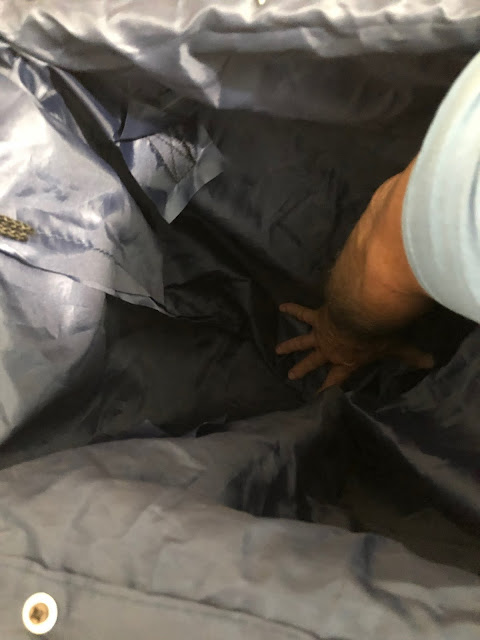
As any RoVer knows a commodious clothes hamper is a delightful thing (I can barely reach the bottom):
STAGE TWO MODS, The Bedroom:
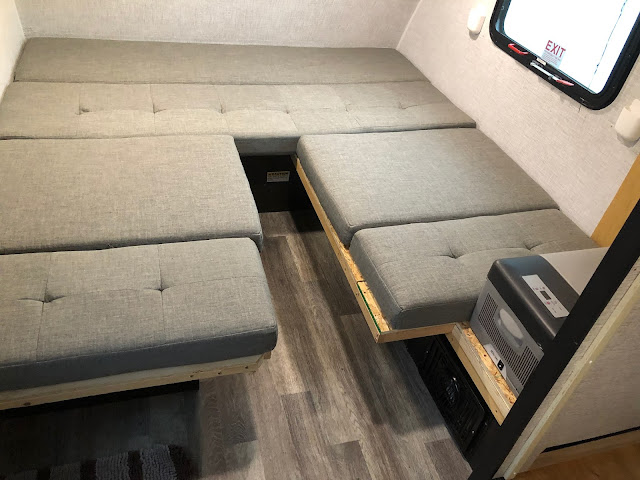
Our Pittsburgh friends visited for several days and we used Raindrop as our bedroom. A serious problem evidenced itself. The bed/lounge space measured 78" wide and only 70" long so we had planned to sleep crossways BUT with Lew in front (old-guy nighttime bathroom access) that trapped Jan who at this stage needs the same access. Hmm. Study revealed that removal of the OEM fridge would permit an extension of the bed space enabling the creation of two 32"X78" beds with an [all-important, (remember old-er people with arthritis)] access isle-way between. Oh, in addition there would be a proper bed between our two pillows for Buffy. 😍 So Lew went to work.
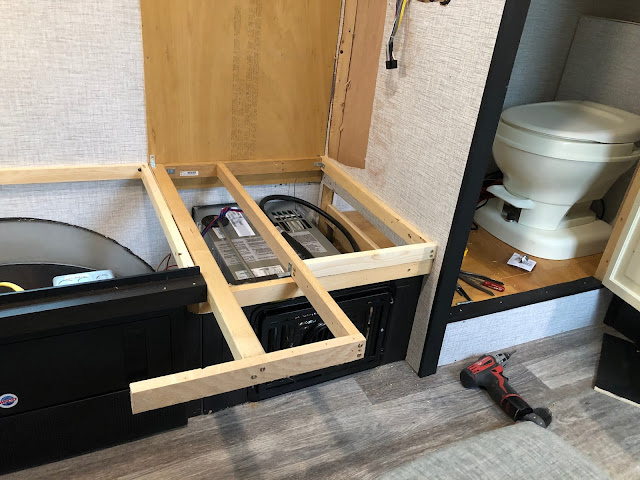
Out with the fridge and it's cabinet:
Then covering the fridge exterior vents (secondary benefit of the MOD, no more campfire smoke sneaking inside our living space):
Framing was built cantilevering the beds thus providing foot space in these tight quarters (stiff sore feet don't twist about like when one was 18):
We were able to reuse the OEM cushions, a definite plus:
Ready for a good night's rest with equal access for all three of us:
Lew was able to develop the remaining space where the fridge had been into much-needed [organized] storage; the drawer plus four 10"X11" wicker baskets:
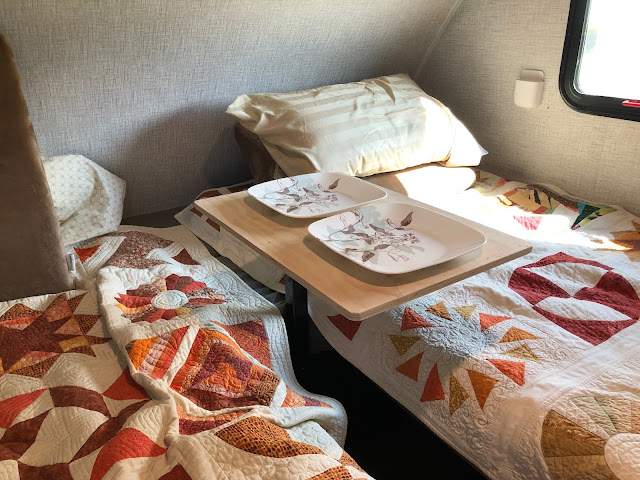
And reusing the OEM mounting hardware there is even space for a small table large enough for two plates and two glasses:
STAGE THREE MODS, THE KITCHEN:
The OEM microwave oven was removed along with the OEM gas cooktop. The countertop was then raised 4" (to a standard 36" height). Into this space was fitted a 12VDC fridge w/freezer compartment.
Oh, and while we were at it Lew removed that obnoxious head-cracker "cupboard" above the countertop, seen at top right in this pic:


Good to hear from ypu!
ReplyDeleteLove this! Thank you for the write up!
ReplyDeleteThank you for doing this
ReplyDeleteNice mods
ReplyDelete